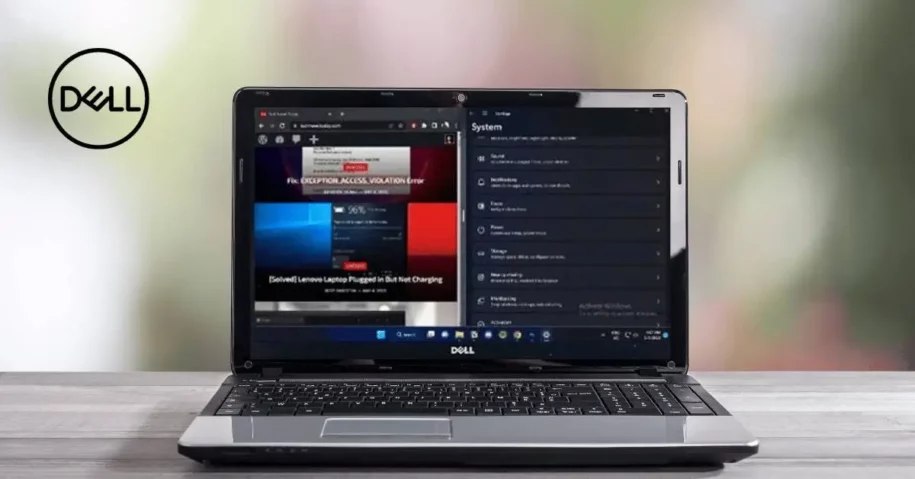
Are you looking for a How To Split Screen on a Dell Laptop? The constant tab and window switching that comes with a Dell laptop can make work a little more difficult. When you need to conduct in-depth research for a project at work or school, that multiplies. Nonetheless, your laptop can split screens, enabling you to work more quickly.
You will learn several techniques to divide the screen on your laptop as you continue reading. With Dell laptops, you can split the screen by clicking and dragging the desired window to any side of the screen and choosing another window.
But you must adjust a few Windows settings if you want the windows to resize to accommodate the split screen automatically. Multitasking will delight you with this guide’s easy and quick method of splitting your screen into two independent windows.
What is the Windows Split Screen Feature?

The ordinary Dell user is aware that they may manually resize each window to make it easier to view and operate if they wish to multitask while using numerous windows. However, as you know, going through this process can take time and effort each time you want to use innumerable windows.
This is when the ability to split screens comes in handy. In essence, this is what the split screen feature accomplishes. It handles that adjusting procedure more automatically and neatly, which is the only difference.
Acquiring the ability to split screen on a Dell laptop allows you to access and monitor up to four windows at once easily. In summary, the ability to see and use many programs on your computer simultaneously without having to worry about resizing windows or wasting time rearranging them is what split-screen functionality does.
Things to Consider While Using Split Screen Feature
Having the split screen feature available can be helpful, but you should know that its applications are limited. It is first limited to the view it provides when two windows are displayed side by side; you cannot change the view to the top or bottom.
But you should know that you can accomplish this if you have a three-window system in place. Now that we have that out let’s see how to turn on this fantastic function on your Dell laptop!
Steps to Use Split Screen on a Dell Laptop

With your Dell laptop running Windows 10, a split screen is a terrific way to view many windows simultaneously. This function helps compare multiple papers side by side or for multitasking. Here’s how to set up your Dell laptop for split screen.
Opening two or more windows that you want to view side by side is the first step. You can access them via the search function or from your taskbar. You can start splitting your screen as soon as the windows are open.
Access Laptop Settings
Navigate to your Dell “Settings” menu. You can use the Start Menu’s search function to get here or the keyboard shortcut Windows key x I.
Locate Snap Windows in Settings
After accessing your device’s multitasking settings, you must find and turn the “Snap Windows” option. You would also need to enable every toggle under this option. Alternatively, based on what you believe to be your user preferences, you may selectively activate certain functionalities.
Use Shortcut Keys
Using the shortcut keys on your Dell laptop is the simplest way to split the screen. Press the left arrow key while holding the Windows key to accomplish this. As a result, the active window will shift to the left side of the display. Next, press the right arrow key while keeping the Windows key depressed.
Doing this will shift the second window to the screen’s right side. Moving windows to the screen’s top or bottom is another feature you may achieve with shortcut keys. To accomplish this, press and hold the Windows key while moving the window to the top or bottom using the up and down arrow keys.
Use Taskbar for Screen Splitting
To split a screen using the taskbar, right-click on it and choose “Show Windows Side by Side.” All open windows will be automatically arranged on the screen so they are side by side. Moreover, you can reposition windows to the top or bottom of the screen using the taskbar.
You can do this by choosing “Show Windows Stacked” right- and right-clicking bar. As a result, all open windows will be moved to the top or bottom of the screen.
Resize the Windows
After your screen has been effectively split, you can adjust the window sizes to your preference. Move your cursor to the window’s edge that you want to enlarge to accomplish this. A double-headed arrow will appear where the mouse pointer was.
After pressing and holding the left mouse button, you can adjust the window’s size by dragging its border. The shortcut keys can also be used to resize windows. Holding down the Windows key while pressing the + or keys accomplishes this. This will cause the active window to resize to a different size.
Use Snap Assisting Feature
Using the snap Assist tool will allow you to adjust the position and size of your windows further. To accomplish this, use the Windows key while holding it down, followed by the up and down arrow keys. This is going to open your open windows in a grid. To relocate a window to a different size or position, select the window and then drag it there.
Using the split screen capability, you can view numerous windows on each display if your Dell laptop is linked to multiple monitors. Please open the windows you want to view, then drag them to the relevant monitor. The windows can then be resized to fit the monitor.
The Snap Assist feature lets you view numerous windows on each monitor. Holding the Windows key while pressing the up or down arrow keys will accomplish this. This will cause your open windows to appear in a grid.
You can drag the window to the appropriate size and location on the monitor after selecting the window you want to move.
Final Words
Managing many tabs significantly impedes your creative flow. With Windows, you have native split-screen support, which lets you divide the screen and run numerous windows or apps. You may open up to six windows at once thanks to a feature refined for Windows 10.
The screen can be divided into four equal halves even more. Instead of dragging the window to the edge of the screen, do so to a corner. As a result, the window in the corner you chose will occupy one-fourth of the screen.
It is important to remember that turning on a split screen on Dell laptops is also the method for turning on a split screen on any other Windows OS device. Therefore, you can be confident that if you need to transition to a new device and still use this capability, you won’t have to lose this efficiency or learn new tactics!


